Arduino HMI Using State Machines Arduino Project Hub
This article will explain how you can implement any finite state machine in a variety of programs, such as an Arduino-powered project. A State Machine Hello World Example

Arduino Relay State Machine YouTube
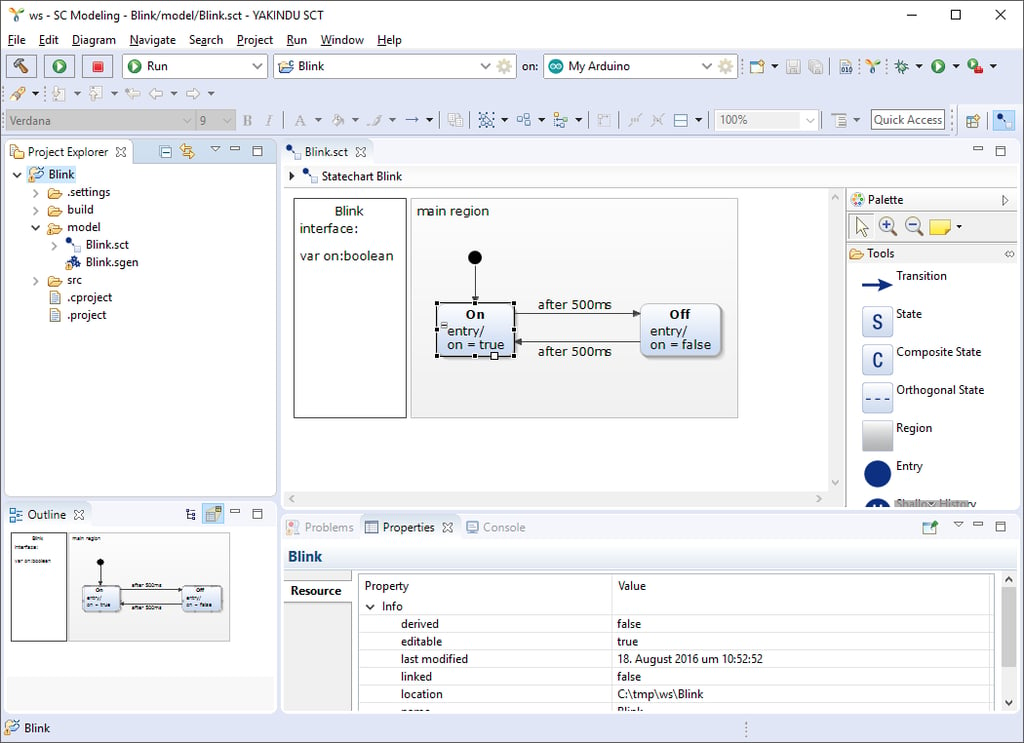
Configuring the Arduino IDE to "Use external editor". This "external editor" is now the QM modeling tool, where you can work with the models (.qm files) and then to generate code from these models. In this scenario, the Arduino IDE is used only to build and upload the code to the Arduino board (s). The following screen shot shows this workflow.

Example StateMachine With ESP32 (Arduino Programming) YouTube
State + Machine = State Machine Note that we have variables to keep track of whether the LED is ON or OFF. And variables to keep track of when the last change happened. That is the State part of the State Machine. We also have code that looks at the state and decides when and how it needs to change. That is the Machine part.

Simple State Machine using Arduino (several leds and a pushbutton
This video goes over what a state machine is, how to draw state transition diagrams, and a basic example using an LED and push button.This video assumes you.
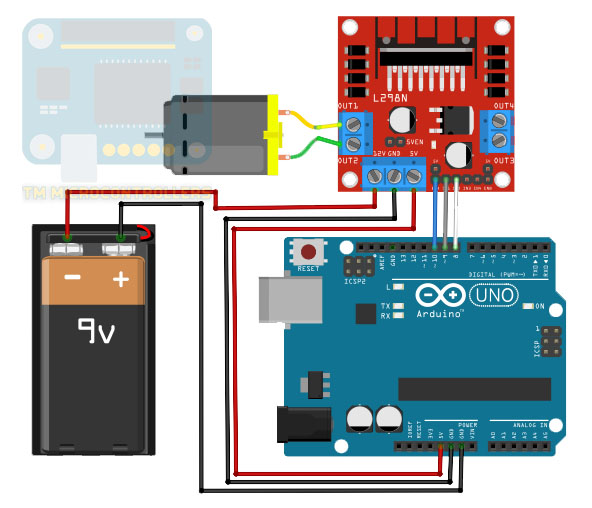
Arduino Finite State Machine and Multitasks 5 Steps (with Pictures
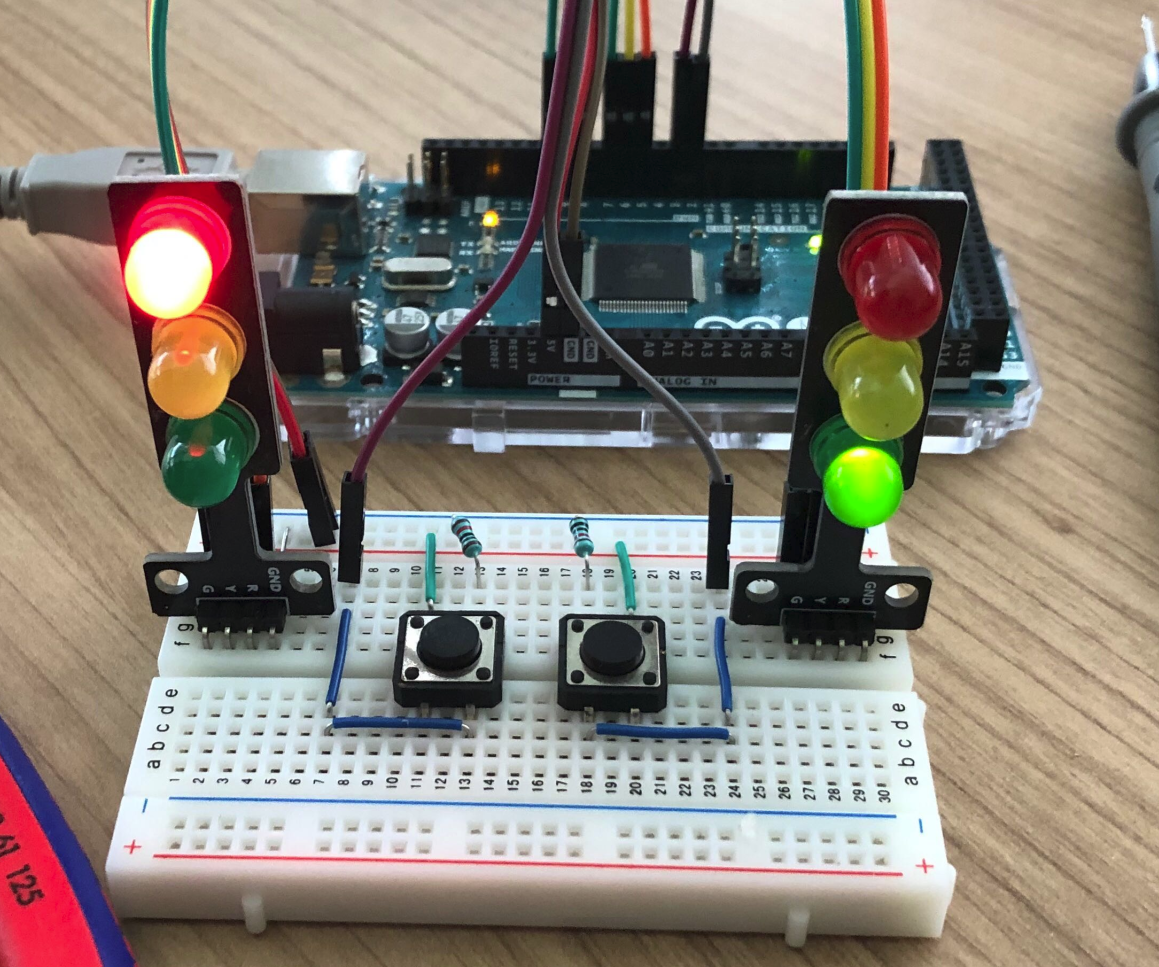
'States' are the situations or conditions your Arduino might be in. 'Transitions' are the triggers that move your Arduino from one state to another. Lastly, 'actions' are the tasks or operations executed in each state. Why Finite State Machines are a Game Changer Imagine a traffic light.

How to program an Arduino with State Machines in 5 minutes
Setting up a state machine with enum is a surprisingly simple. Arduino and embedded programmers should use them! All you need to do is create descriptive tag names, and let the compiler assign them an integer value. Unlike a #define which is just a macro replacement, the compiler treats an enum as your personal variable type.

Arduino Flowmeter With a State Machine 4 Steps Instructables
This is called. state change detection, or edge detection. This example shows how to detect when a button or button changes from off to on. and on to off. The circuit: - pushbutton attached to pin 2 from +5V. - 10 kilohm resistor attached to pin 2 from ground. - LED attached from pin 13 to ground through 220 ohm resistor (or use the.
State Machine on Arduino a Pedestrian Traffic Light 6 Steps (with
Right there are four 'states' - 1. Closed, waiting for open command; 2. Opening, waiting for top limit; 3. Open, waiting for down command; 4. Closing, waiting for bottom limit. Notice there are three elements for each state: A name, usually describing what the state does.
Program an Arduino with State Machines in 5 Minutes
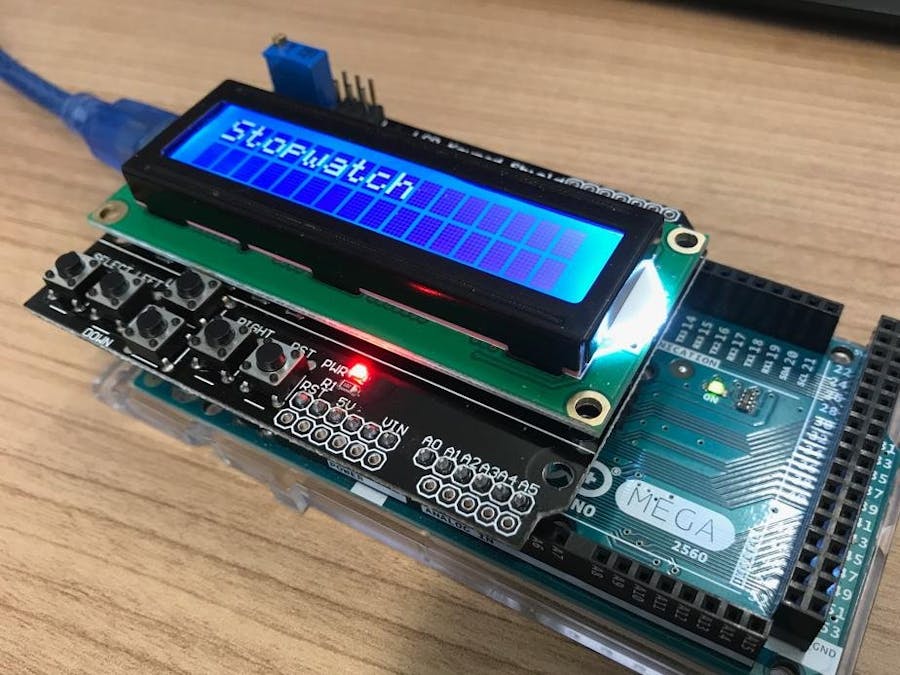
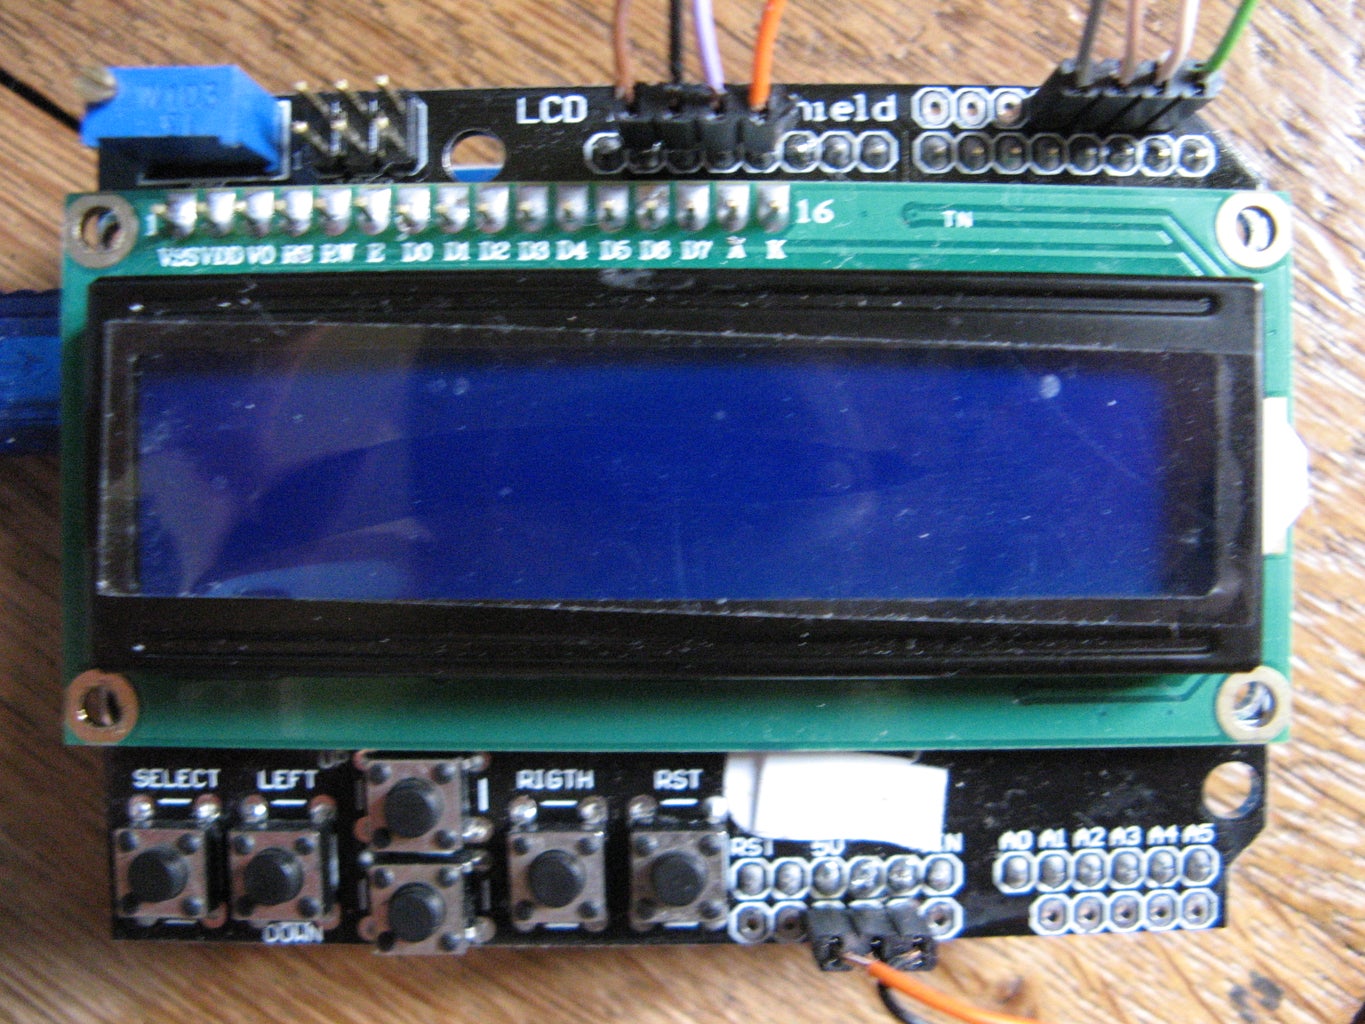
Example code using a state machine. Here we have a DHT11 sensor, a push-button switch, and an OLED display all hooked up to an Arduino MEGA. The DHT11 is both a temperature and humidity sensor connected via a 1-wire serial interface. The OLED screen is 128×64 pixels interfaced through I2C. The DHT11 is a slow capacitive type sensor that must.
Arduino State Machine Tutorial Microcontroller Tutorials
Today, we will implement a finite-state machine (FSM) on an Arduino. This allows you to set up systems with a precisely defined behavior based on distinct states. You will learn what a finite-state machine is and what it's good for.
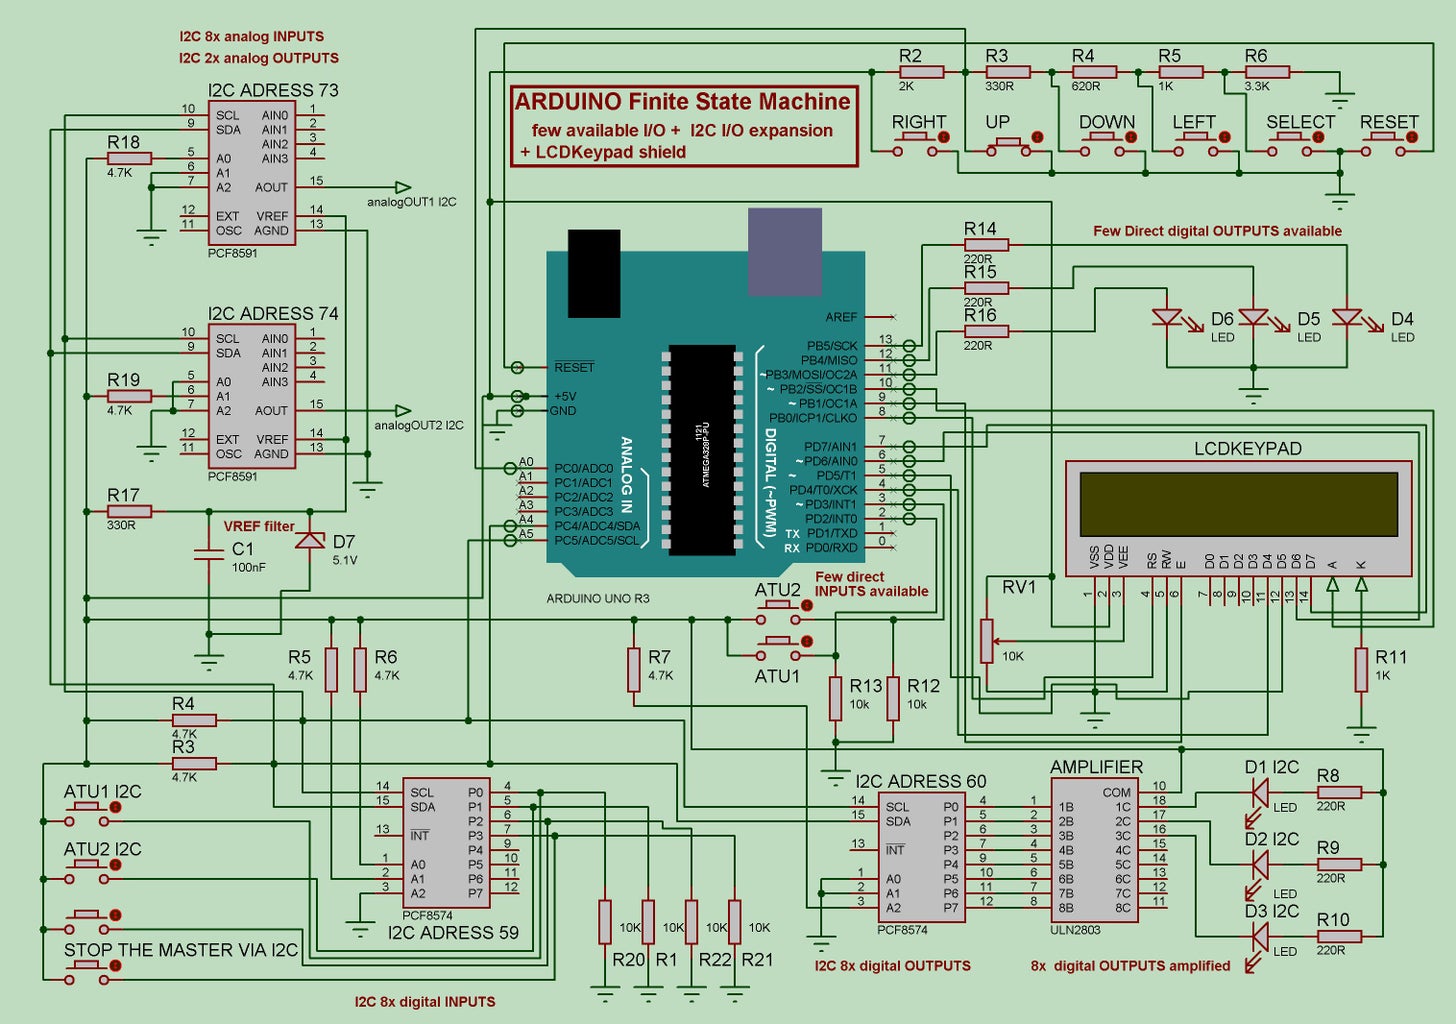
Arduino Finite State Machine and Multitasks 5 Steps (with Pictures
Project and Video by Chris Guichethttps://www.normaluniverse.comA State Machine is a mental tool to help you organize your code. The best part is that you c.
Arduino State Machine Tutorial Microcontroller Tutorials
StateMachine Device Control "A simple state machine implementation." A state machine is implemented by defining state logic as a function in your sketch. Transitions are implemented as functions returning a boolean value and a next state number. Requires LinkedList library https://github.com/ivanseidel/LinkedList. Author: Jose Rullan

pl11 Arduino rotary encoder state machines YouTube
Let's dive into a step-by-step approach for implementing a state machine in your Arduino project: Step 1: Identify the States: Begin by identifying the different states your system can be in. Consider the various behaviors, conditions, or modes that your project needs to handle.

Arduino OO state machine YouTube
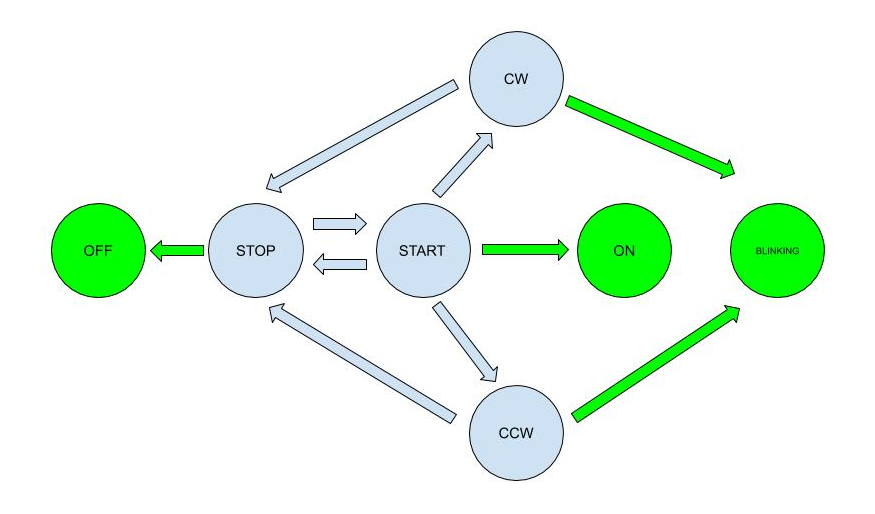
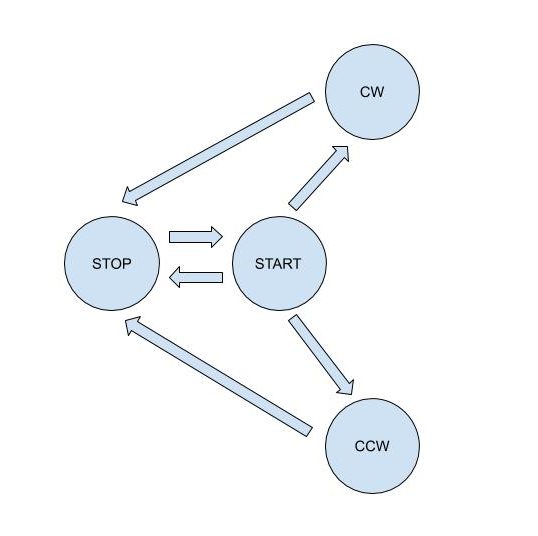
To create a state machine you need a set of states, inputs and outputs. States An embedded system should at any given time be in a defined state, whether it is "moving left", "door open", "stopped", "init", "error" or any other imaginable state. The states and the transitions between them make up the main structure of the state machine. Inputs
Arduino State Machine Tutorial Microcontroller Tutorials
What is a state machine? It is a way to describe what a system is designed to do (output) depending of the state is presently in. As an example, we could use an LED. An LED can only be in one of two states: {ON, OFF}. Each state is mutually exclusive of the other. An LED cannot be simultaneously ON and OFF.
Program an Arduino with State Machines in 5 Minutes
What is a state machine? It is a way to describe what a system is designed to do (output) depending of the state is presently in. As an example, we could use an LED. An LED can only be in one of two states: {ON, OFF}. Each state is mutually exclusive of the other. An LED cannot be simultaneously ON and OFF.